
Serverless TTN POST Adapter
Read this document on Github Pages.
This project demonstrates how to connect an application configured on The Things Network (TTN) console to a variety of cloud data services without running your own server. The current adapter supports data services from Adafruit IO, OpenSensors, SlicingDice, and Pyroclast.
The adapter described herein uses AWS Lambda to host a conversion and relay function and the Serverless command line tools to simplify deployment.
The advantages of going serverless are cost and capacity. At current pricing 1,000,000 posts will cost $0.10 per month. At low data rates, running Lambda functions can be much cheaper than running your own server to perform simple operations. As your data rates increase, the same Lambda function will work for 1 billion per month (~1m per hour). Of course it will cost more (like, ~$100/mo), but it won’t fail and won’t force you to make system changes while your service is gaining users. Also, you pay for only the requests that get made - you don’t have to provision service ahead of time to handle bursts of traffic.
Discussion
The TTN HTTP Integration produces a JSON object.
If you take advantage of the Custom Payload Formats option on the TTN console
your data will be parsed and sitting in a map under the payload_fields key
of the JSON object.
Cloud databases generally accept JSON posted data, but with their own formats and constraints.
- OpenSensors will accept an object of the
form
{"data": message}, wheremessageitself is not a JSON object. The post is rejected if there are any keys other thandatain the object. (Don’t forget the double slash//followingtopicsin the post URL. It won’t work without it (example:https://realtime.opensensors.io/v1/topics//users/username/device)) - SlicingDice requires a POST to be structured as
an entity insertion.
{ "my-device-id": { "device-name": "my device name", "temperature": [ { "value": 25, "date": "2017-05-26T12:54:12Z" } ], "table": "sensor-data" }, "auto-create": ["table", "column"] } - Pyroclast accepts a deep JSON object, but the root
object has to be of the form
{"value": data-object}with your data under thevaluekey. Other root level keys are ignored, though the the point of adding a wrapping layer was likely to support adding keys at the root to control processing, so this is likely to change. - Adafruit IO accepts a JSON object with
valueandcreated_atfields. The REST URL includes the username and feed name, likehttps://io.adafruit.com/api/v2/username/feeds/feedname/data. Also, Adafruit uses anX-AIO-Keyinstead ofAuthorization.
Usage
In the TTN Console for your app, you set up an HTTP Integration that points to the Lambda function. A parameter on that URL specifies the destination where the transformed JSON should be posted.
The Authorization key specified in the TTN HTTP Integration is passed through
to the ultimate database API POST. Therefore you don’t have to embed a key in
the Lambda code.
Unless you’re using one of the databases this adapter already handles, you’ll
have to write your conversion code in the handler.js file and add an event
specification in the serverless.yml configuration file.
TTN Integration
- Create and view an app in the TTN console.
- Add an HTTP Integration.
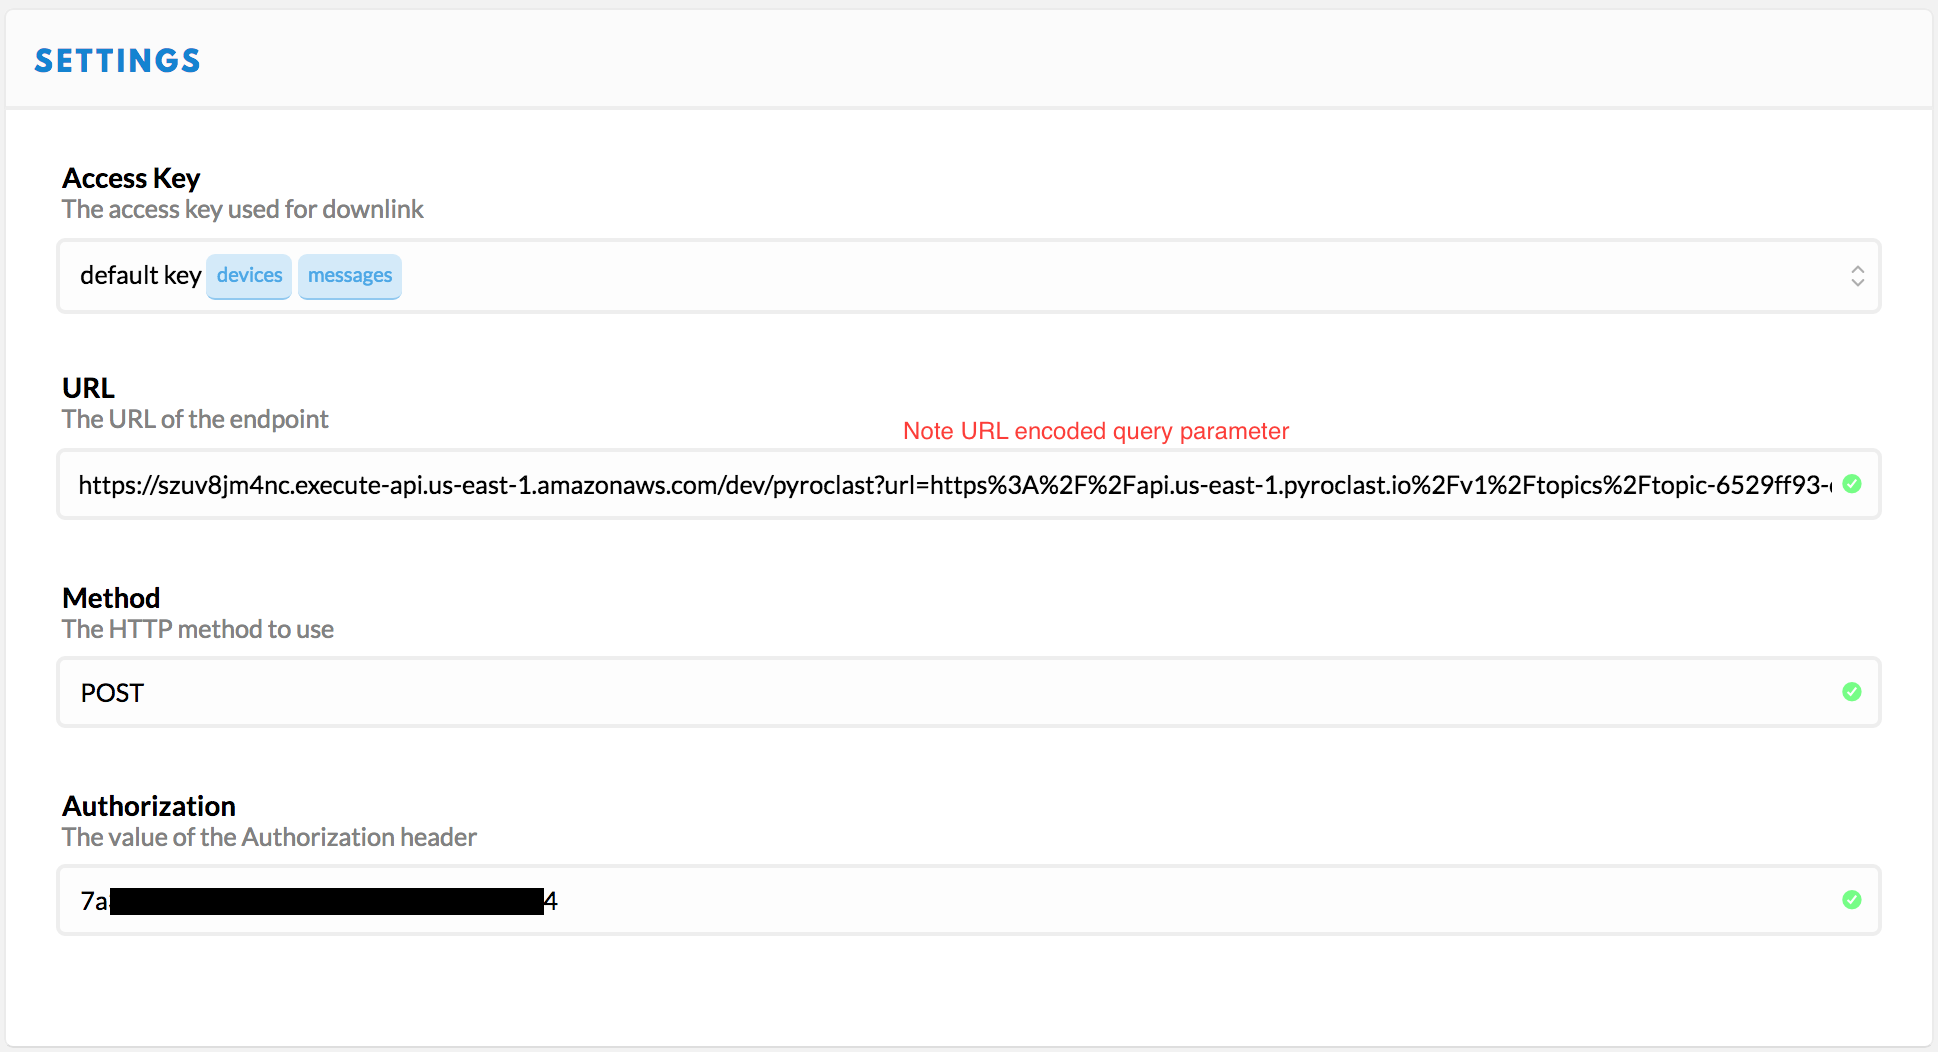
- Choose the “default key” for Access Key, or a more restricted one that has access to messages only if you’ve set that up.
- Create the URL by concatenating
- The service URL
https://szuv8jm4nc.execute-api.us-east-1.amazonaws.com/dev/pyroclast - The string
?url= - URL encoded destination URL:
https%3A%2F%2Fapi.us-east-1.pyroclast.io%2Fv1%2Ftopics%2Ftopic-xxxxxxxx-xxxx-xxxx-xxxx-xxxxxxxxxxxx%2Fproduce
- The service URL
- Paste the result in the URL field.
- Choose
POSTfor method. - Paste the Authorization key value from your database provider into the Authorization field.
It should look something like this when you’re done:
Local Setup
In order to modify and deploy your own version of the code, you will need to perform the following setup steps.
- Install AWS command line tools
- Install Node & NPM
- Install the Serverless command line tools.
npm install serverless -g - If using AWS IAM Access Management (as opposed to using your main Amazon account credentials), you will need to add permissions that allow Serverless to do its job. See below for details.
- Clone this repo to your local machine
Deploy
In order to deploy the function run:
serverless deploy
The expected result should be similar to:
Serverless: Creating Stack…
Serverless: Checking Stack create progress…
.....
Serverless: Stack create finished…
Serverless: Packaging service…
Serverless: Uploading CloudFormation file to S3…
Serverless: Uploading service .zip file to S3…
Serverless: Updating Stack…
Serverless: Checking Stack update progress…
................
Serverless: Stack update finished…

Service Information
service: ttn-post-adapter
stage: dev
region: us-east-1
api keys:
  None
endpoints:
  POST - https://szrf8jm4nc.execute-api.us-east-1.amazonaws.com/dev/rename
  POST - https://szrf8jm4nc.execute-api.us-east-1.amazonaws.com/dev/opensensors
  POST - https://szrfv8jm4nc.execute-api.us-east-1.amazonaws.com/dev/slicingdice
  POST - https://szrf8jm4nc.execute-api.us-east-1.amazonaws.com/dev/pyroclast
  POST - https://szuv8jm4nc.execute-api.us-east-1.amazonaws.com/dev/adafruit
functions:
  ttn-post-adapter-dev-index: arn:aws:lambda:us-east-1:372342378620:function:ttn-post-adapter-dev-index
By default, deployments go to stage dev. You’ll note the /dev/ part of the
path in the endpoints. Once everything is working right, you’ll want to deploy
to a more permanent environment, like production or v1. To do that, simply
set the stage on the deploy command line.
serverless --stage v1 deploy
Adding your own handler
There are two steps required to add your own adapter for, say, favoritedb.
- Add an section to the
serverless.ymlunder the- eventskey specifying the path name for your adapter.
      - http:
          path: favoritedb
          method: post
- Define your handler function. It must use the same name as your path
specification to be found by the existing logic.
All current handlers use the
makeWithModulatorfunction to perform common work like parsing theevent.bodyto JSON, posting the transformed JSON, and constructing the response object.
  handler.favoritedb = makeWithModulator(function (event, context, data, cb) {
    // Transform data as appropriate
    cb(null, data);
  });
Testing
When you add your own handler, add a corresponding test in
test/handler.test.js. Run tests at the command line using npm test to
make sure you haven’t broken anything.
Invoking the Lambda function from the command line
The following command lines assume you have defined the appropriate variables
in a file called .env. (I do that and include it in .gitignore in order to
avoid accidentally posting app keys to a public repo.)
My .env file looks something like this:
OPENSENSORS_TOPIC_URL=https://realtime.opensensors.io/v1/topics//users/username/topicpath/temperature?client-id=XXXX&password=XXXXXXXX
OPENSENSORS_AUTH_HEADER="api-key <uuid key>"
SLICINGDICE_AUTH_HEADER=<very long key>
PYROCLAST_TOPIC_URL=https://api.us-east-1.pyroclast.io/v1/topics/topic-xxxxxxxx-xxxx-xxxx-xxxx-xxxxxxxxxxxx/produce
PYROCLAST_AUTH_HEADER=<uuid key>
SLS_DEBUG="'*'"
Make sure to include at least the Serverless debug flag
SLS_DEBUG="'*'"in the.envfile in order to see debug output from your code when you run it locally.
The
( . .env ; env -S "`cat .env`" command args )sucks vars out of a file and makes them available both on the command line and in the execution environment.
I couldn’t use single quotes below because they prevent $VAR expansion. I wanted a command that could be copied directly from this document and pasted into the terminal without exposing any of my private keys.
You could skip one level of escaping below by putting your data in a file and passing it in with
serverless invoke --path data.json. You lose $VAR expansion, but as long as you’re not committing the doc to a repo your keys are as safe there as they are in the.envfile.
Lastly, without the
localparameter,serverless invokeinvokes the deployed version of the function on AWS.
OpenSensors invocation
( . .env ; env -S "`cat .env`" serverless invoke local --log --function index \
  --data "{\"body\": \"{\\\"payload_fields\\\": {\\\"temperature\\\": 25}}\", \
  \"queryStringParameters\": {\"dataname\": \"data\", \
  \"url\": \"$OPENSENSORS_TOPIC_URL\"}, \
  \"headers\": {\"Authorization\": \"$OPENSENSORS_AUTH_HEADER\"}, \"path\": \"/opensensors\"}")
The expected result is
{
    "statusCode": 200,
    "body": "{\"message\":\"Message sent\"}"
}
SlicingDice invocation
( . .env ; env -S "`cat .env`" serverless invoke local --log --function index \
  --data "{\"body\": \"{\\\"metadata\\\":{\\\"time\\\":\\\"2017-06-14T16:15:41.169291958Z\\\"}, \
  \\\"hardware_serial\\\": \\\"test-device-id\\\", \
  \\\"payload_fields\\\": {\\\"temperature\\\": 26.5}}\", \
  \"queryStringParameters\": { \
  \"url\": \"https://api.slicingdice.com/v1/test/insert\"}, \
  \"headers\": {\"Authorization\": \"$SLICINGDICE_AUTH_HEADER\"}, \"path\": \"/slicingdice\"}")
The expected result is
{
    "statusCode": 200,
    "body": "{\"status\":\"success\",\"inserted-entities\":1,\"warning\":\"Using TEST endpoint. Remember to change to the api.slicingdice.com/v1/ endpoint before going to production.\",\"inserted-values\":1,\"took\":0.118}"
}
Pyroclast invocation
( . .env ; env -S "`cat .env`" serverless invoke local --log --function index \
  --data "{\"body\": \"{\\\"payload_fields\\\": {\\\"temperature\\\": 26.5}}\", \
  \"queryStringParameters\": {\"url\": \"$PYROCLAST_TOPIC_URL\"}, \
  \"headers\": {\"Authorization\": \"$PYROCLAST_AUTH_HEADER\"}, \"path\": \"/pyroclast\"}")
The expected result is
{
    "statusCode": 200,
    "body": "{\"created\":true}"
}
Adafruit invocation
( . .env ; env -S "`cat .env`" serverless invoke local --log --function index \
  --data "{\"body\": \"{\\\"metadata\\\":{\\\"time\\\":\\\"2017-06-14T16:15:41.169291958Z\\\"}, \
  \\\"payload_fields\\\": {\\\"temperature\\\": 26.5}}\", \
  \"queryStringParameters\": {\"field\": \"temperature\", \
  \"url\": \"$ADAFRUIT_URL\"}, \
  \"headers\": {\"Authorization\": \"$ADAFRUIT_AUTH_HEADER\"}, \"path\": \"/adafruit\"}")
The expected result is
{
    "statusCode": 200,
    "body": "{
      \"id\":\"0DKT4Y7X3CGCV1E262FXSM76SZ\",
      \"value\":\"26.5\",\"feed_id\":682645,
      \"created_at\":\"2017-06-14T16:15:41Z\",
      \"location\":null,\"lat\":null,\"lon\":null,\"ele\":null,
      \"created_epoch\":1497456941,
      \"expiration\":\"2017-07-16T06:14:12Z\"}"
}
AWS IAM Policies
The serverless tools run under an AWS user identity. Best practice is to use the IAM service to create a new user with restricted access to services and resources.
The following script will create a user and apply the policies required to
successfully run serverless deploy.
- Log in as your primary AWS identity (using
aws configure) Alternatively, you could use any identity with sufficient permission to perform these policy changes. (Permissions defined in policies/IAMPolicySetting.json) - Run the commands below using whatever name you prefer instead of “TTNPostUsername” in the first line.
IAMUSER=TTNPostUsername aws iam create-user --user-name $IAMUSER aws iam attach-user-policy --policy-arn "arn:aws:iam::aws:policy/AWSLambdaFullAccess" --user-name $IAMUSER aws iam attach-user-policy --policy-arn "arn:aws:iam::aws:policy/AmazonAPIGatewayInvokeFullAccess" --user-name $IAMUSER aws iam attach-user-policy --policy-arn "arn:aws:iam::aws:policy/service-role/AmazonAPIGatewayPushToCloudWatchLogs" --user-name $IAMUSER aws iam attach-user-policy --policy-arn "arn:aws:iam::aws:policy/AmazonAPIGatewayAdministrator" --user-name $IAMUSER aws iam attach-user-policy --policy-arn "arn:aws:iam::aws:policy/AWSCloudFormationReadOnlyAccess" --user-name $IAMUSER aws iam put-user-policy --policy-name ServerlessLogs --policy-document file://policies/ServerlessLogs.json --user-name $IAMUSER aws iam put-user-policy --policy-name ServerlessCloudFormation --policy-document file://policies/ServerlessCloudFormation.json --user-name $IAMUSER aws iam put-user-policy --policy-name ServerlessIAM --policy-document file://policies/ServerlessIAM.json --user-name $IAMUSER - Use
aws configureagain and set the new user security credentials. This causes you to begin interacting with AWS as the new user identity. You can find the credentials under the Security tab in the AWS IAM Console.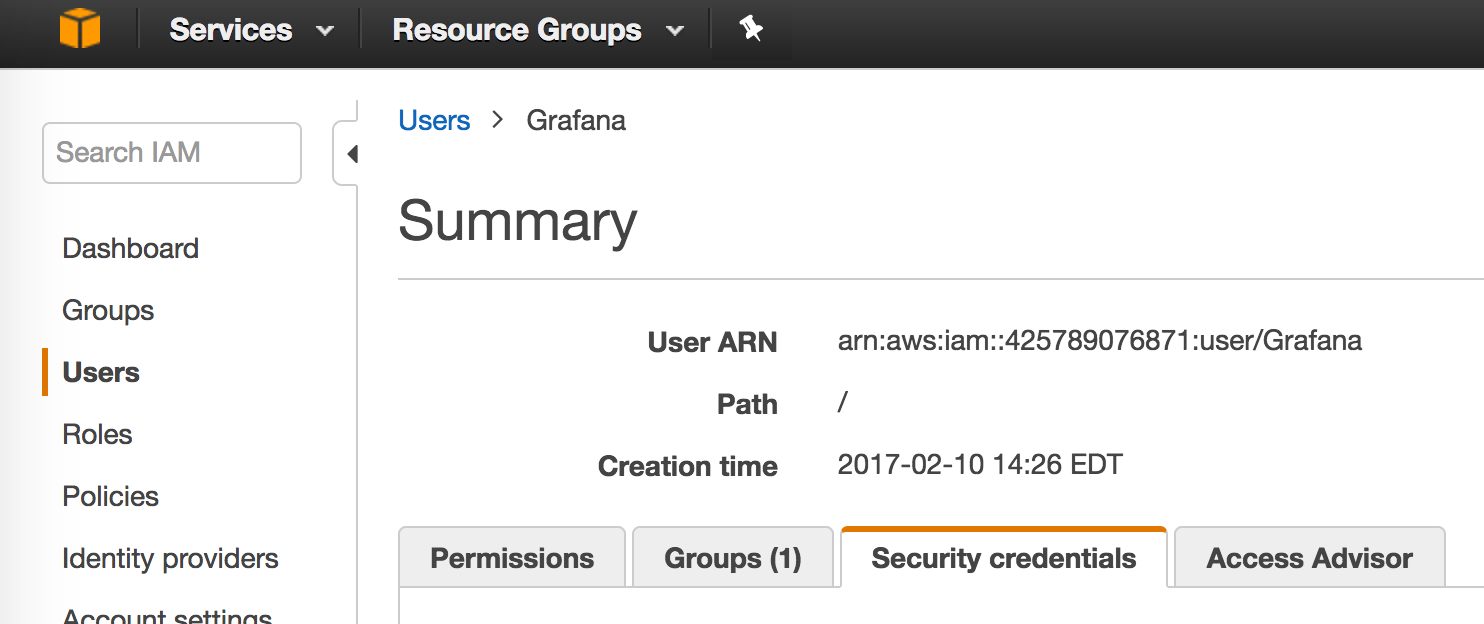
- Now run
serverless deploy
Document History
- 2017-06-14 - Initial version
- 2017-06-15 - Added Adafruit IO database adapter
- 2017-06-16 - Added scripts for policy setting
- 2017-06-18 - Added instructions for running automated tests and Travis build status
Copyright
Copyright (c) 2017 Frank Leon Rose